
Handmade Ceramic Lamp Bases for Interiors
Why Make Your Own Lamp Base
A lamp base is one of the most rewarding things you can throw. It is a cylinder with a job to do, so it teaches you discipline at the wheel while still leaving plenty of room for your own character in the profile, the glaze and the finish. Better still, a handmade base solves a problem that shop-bought lamps rarely do: proportion. When you make the base yourself, you can match it precisely to a shade you already love, to the height of a side table, and to the corner of the room it will live in.
There is a practical bonus, too. Ceramic is heavy, and weight is exactly what a lamp needs. A well-thrown stoneware base of 1.5–2.5kg for a table lamp, or 4–6kg for a floor standing piece, will resist a nudge from a hoover or a cat far better than anything hollow and plastic.
Choosing a Clay Body That Can Take the Weight
For lamp bases, a grogged stoneware is the sensible choice. It fires to 1240–1260°C, giving a vitrified body that is strong, reasonably chip-resistant and stable around the gentle warmth of a bulb. Fine grog also reduces shrinkage and helps thicker sections dry without cracking, which matters on a base with a solid foot.
- Aim for a stoneware with 10–20% fine grog. Enough tooth for strength, not so much that it tears as you pull.
- Avoid heavily speckled bodies for the first attempt. Speckles are lovely, but they make it harder to see the evenness of your walls.
- Weigh out your clay before you start. Around 1.5–2kg for a 25–30cm table base is a good working figure, and knowing your starting weight helps you repeat a form you like.
- Wedge thoroughly. Air pockets in a thick base become blowouts in the kiln, and a lamp base has nowhere to hide them.
Throwing a Cylinder With a Purpose
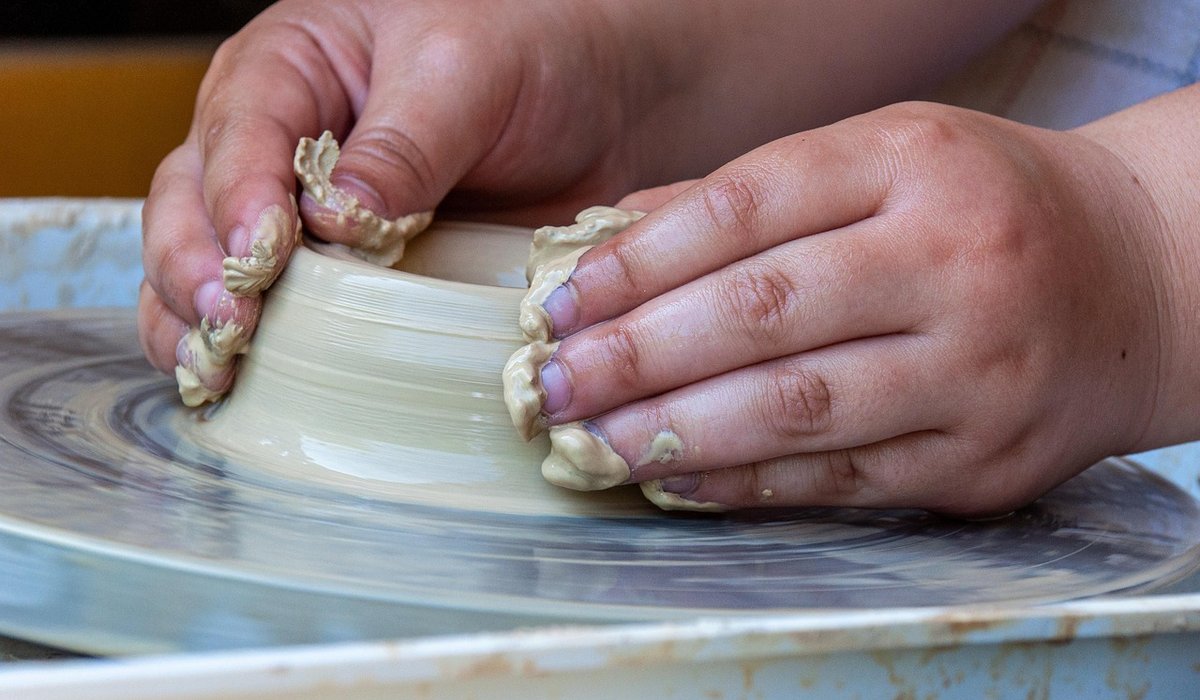
Centre the clay, open down to a firm base, then pull the walls up in three or four controlled passes. Throw the base a little thicker than you would for a mug, around 8–10mm, then thin the walls to roughly 6–8mm as you rise. Consistency matters more than absolute thinness here; an even 7mm wall will outlast a wobbly 4mm one every time.
- Leave an opening at the top of 38–40mm. This comfortably accepts a standard UK threaded rod and lamp holder base, and it is much easier to keep true than a small hole.
- Throw a short neck or collar. A slightly narrowed top gives the fitting something to sit against and hides the hardware neatly.
- Keep the profile simple. Gentle tapers, soft bellies and clean cylinders all read beautifully once glazed; fussy rims just fight with the shade.
- Trim at leather-hard. Cut a foot ring with a recess that will later take a felt pad, and check the base sits dead flat — a wobbling lamp is maddening.
Drilling the Cable Hole at the Right Moment
The moment to make the cable exit is when the clay is leather-hard: firm enough to hold its shape, soft enough to cut cleanly. Never attempt this on a bone-dry or fired pot — a fired base will simply crack or shatter.
Drill a 8–10mm hole roughly 25–40mm up from the base, using a sharp hole cutter, a brass tube or a length of dowel dipped in water. Support the inside of the wall with a rolled newspaper or a wooden former so the pressure does not distort the cylinder. Work slowly, keep the tool wet, and cut from the outside in. Deburr both edges with a damp finger and a soft sponge, then smooth a little slurry into the cut to seal any torn clay.
An easier and often neater alternative is to cut a slot in the foot ring instead, letting the flex run out under the base. It is less visible, less prone to glaze clogging and quicker to tidy up. Whichever you choose, make the hole generous: you need room to thread the flex through without scraping its insulation.
Hardware, Flex and Safety
Use proper lamp hardware rather than improvising. In the UK that means an E27 or B22 lamp holder, a 10mm threaded rod cut to length, a nut and washer to clamp the fitting from inside, and a heat-resistant flex of at least 0.75mm² three-core cable with a 3A fuse in the plug.
- Fit a rubber grommet or cord grip where the flex passes through the clay, so the sharp edge cannot chafe the insulation over time.
- Keep the interior smooth and hollow so the flex slides freely when you assemble or rewire.
- Add a felt or cork pad under the foot, both to protect furniture and to absorb any slight unevenness.
- If you intend to sell, have each lamp electrically tested by a competent person and comply with current UK wiring regulations. A beautiful base is no excuse for a questionable plug.
Glazing, Firing and Finishing
Glaze your base with the same care you would give a vessel, but with two areas of restraint. Keep the inside of the neck and the rim clear of heavy glaze build-up, or the fitting will not sit flush. Wax-resist the foot ring so the base sits flat without grinding afterwards, and avoid very runny glazes near the cable hole, where a drip can seal the opening you worked so hard to cut.
Bisque fire to around 1000°C, then glaze fire to your body's maturing temperature, usually 1240–1260°C. Test-fit your hardware on the bisque before the final firing, so any adjustment happens while the clay can still forgive you.
Once cool, check the base rocks-free on a flat surface, ease the foot with a little fine abrasive paper if needed, fit the grommet, thread the flex, wire the holder and stand back. A lamp you threw, drilled, glazed and wired yourself throws a very different light.
tag: Home Decor

Emily Hartley Author
Use grogged stoneware clay and slow firing to create pots that survive winter freezing and thawing in British gardens.
YOU MAY ALSO LIKE
Making Frost-Resistant Plant Pots for Gardens
Jul 10
10Shape shallow basins with textured rims, then glaze safely so birds can drink and bathe without slipping or injury.
read more
Creating Ceramic Bird Baths for Wildlife
Jul 7
10Apply coloured slips and oxide washes to leather-hard pots for natural finishes that enhance outdoor plant displays beautifully.
read moreWheel Throwing
-

ERRIC CATONA
Learn to centre clay consistently by applying steady pressure and keeping your elbows locked against your body for better control.
May 19, 2016 at 5.12 pm
Reply
ERRIC CATONA
Master consistent wall thickness by pinching evenly and pulling slowly from the base to the rim with steady hand pressure.
May 19, 2016 at 5.12 pm
Reply -
ERRIC CATONA
Turn leather-hard pots on the wheel to refine foot rings and create balanced forms without distorting delicate walls.
May 19, 2016 at 5.12 pm
Reply
Hand Building
Your email address will not be published.